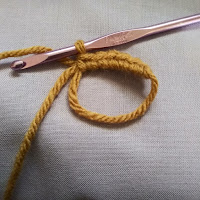
The magic circle (as I like to call it) a.k.a the magic ring and probably other names as well.
In my opinion is one of the most essential keys to Amigurumi. Having the beginning of a piece looking its best, makes all the difference.
Seeing stuffing is probably the worst in my book but messy beginnings are a close second.
The goal is to have your end result like this...
Not this...
Maybe your thinking, I don't see much of a difference.
Lets put them side by side and see if you see it now.
As you can see the center of the magic circle is completely closed vs the ch 2 method has a center hole. For me, no matter how many times I try, ch 2 always leads to a center hole. Drives me nuts!!
It is time to learn the magic circle!!
Let's begin...
Holding the yarn tail over the fingers and into the palm of your hand, pinch it to your index finger with thumb.
When you have reached your desired amount of stitches, move the tail out from inside the loop.
Grab the tail and pull until the hole is closed.
After completing round 2, grab the tail and pull it snug again and this time put 3 knots on it as close to the work as possible.
I hope this picture tutorial was helpful AND if at first you don't succeed, try, try again.


No comments:
Post a Comment
Note: Only a member of this blog may post a comment.